 The organization of the blind area around the house can not be called the most difficult task in its construction, but this, a simple matter, has its own characteristics. Let's find out why we need such an addition at all, what kinds of its emit and how to apply them correctly.
What is blind area?
Blind area - waterproof coating, presented in the form of concrete or paved tape encircling the house around the perimeter. Such a protective belt starts from the walls of the building and passes on the ground from all its sides, performing several important functions: 
- prevents the emergence of swelling forces in the ground caused by freezing of water that has entered the base of the foundation (if such forces are unevenly distributed on all sides of the foundation, the structure will gradually be squeezed out of the ground, which manifests itself in cracks causing destruction of the house);
- minimizes the impact of water flowing down from above on the side parts of the foundation, which can also lead to the destruction of the house (a load of 5-7 tons can affect 1 square meter of wall);
- reduces the moisture of the soil directly adjacent to the foundation of the house (with poor waterproofing of the foundation and strong moisture of the soil, moisture may well get into the basement room);
- serves as a sidewalk, on which people are very comfortable to move around the house;
- It increases the decorative and aesthetics of the site, especially if the blind area harmonizes well with the decoration of the house.
Video: The role of blind area for house construction
Blind area
The width of the structure described is chosen not only from personal preferences, but also taking into account other, much more important, factors. First of all, it is necessary to determine the strength of subsidence of the soil on the specified terrain..
Important! Even the highest quality material for the construction of such a track will not be able to perform these functions if you do not follow the rules for its installation. In addition, in case of unsuccessful placement, the blind area itself will be subject to destruction.
So, for example, clay and sandy soils subside more often than fertile or especially dense soil, so if possible, you need to accurately determine this feature.
According to laboratory tests, all soils can be divided into two main types:
- drawdown of its own weight of the earth is completely absent or is no more than 5 cm (can occur mostly due to external influence);
- the drawdown is possible not only because of external influence, but also because of its own weight of the soil, and its level exceeds 5 cm.
For soils belonging to the first type, the width of a well-laid “path” should not be less than 1.5 m, and if the house is on soil mixtures of the second type, then it is desirable to increase it to 2 m.
In addition, when building a house on subsiding areas, it is necessary to achieve the passage of the foundation of this layer and be sure to use special construction technologies.  For arranging the blind area on well-bearing soils, its minimum allowable width may be 0.8-1.0 m, but with a mandatory elevation of the roof overhang by 30-40 cm above the walls.
It will be useful for you to learn how to roof the roof with ondulin.
The necessary width of the blind area is measured from the wall of the house with the help of a tape measure, and if you plan to use the finished track as a path, then you can add a few more tens of centimeters to the required width for your plot.
If this is not done, then it will not be very convenient to walk along the blind area of 80 cm. At the measured distance it is necessary to stick the pegs and connect them with a string or a thick thread, which will allow you to gently dig up the desired section, without wasting extra forces on the alignment.
Incline
This characteristic largely determines the level of functionality of the blind area in terms of the protection of the structure. Thus, insufficient inclination contributes to a limited diversion of water from the foundation, which ultimately leads to its destruction.
With the right angle selection, it is possible not only to make the protection as efficient as possible, but also to reduce material costs for its construction..
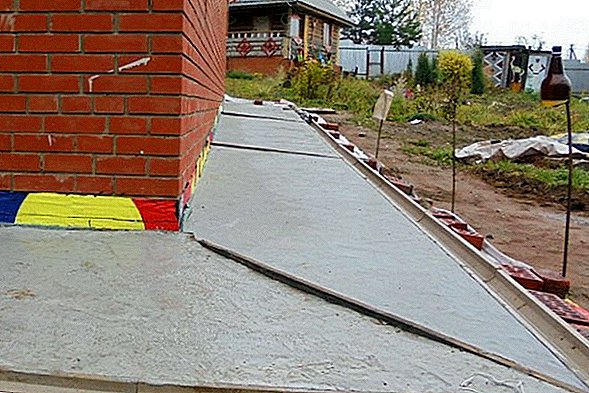
The cross slope is determined by generally accepted standards and should be about 1.5-2% of the total blind area, which in digital terms equals 15-20 mm per meter of width.  To achieve this result in several ways:
- by creating an appropriate angle of inclination of the cushion web at the initial stage of the blind area construction;
- creating a certain slope of the upper covering by uneven application of its layer: it is always larger at the outer wall of the building, but smaller from the opposite side.
Did you know? In modern China, there are entire neighborhoods that are fully consistent with some cities in Europe. For example, not far from Shanghai (approximately 30 km) you can walk along a standard German city, with the same buildings, lanterns and even monuments to Schiller and Goethe, and the city of Chengdu in this regard almost completely corresponds to Dorchester located in England.
Warming
It makes sense to warm the blind area only if it is located around a heated house. At the cottages and near other buildings for seasonal living it will have little or no value.
A layer of insulation in the construction of the blind area has several significant advantages:
- reduces the likelihood of soil freezing and winter heaving;
- reduces material expenses for home heating;
- reduces the height and cost of the foundation, but only when laying the blind area at the design stage of the house (the depth of the foundation is calculated from the reduction factors);
- maintains the finishing of the basement.
Extrusion polystyrene foam or polyurethane foam can be used as insulation materials..
The thickness of such a warming layer on fine-grained soils of the middle band should be about 50 mm. Detailed calculations of the thickness of the insulation of the blind area are carried out on the basis of the specific climatic conditions of a particular region. 
Types of blind area at home
Today, there are several popular types of blind area, and while some homeowners choose the simplicity and practicality of concrete, the other is more important than the aesthetic appearance of such a protective layer, because of which the choice falls on paving slabs or other cobbled species. Consider each of them more closely.
Out of concrete
Concrete is considered to be one of the safest and cheapest ways to build a blind area., besides, it provides a sufficiently high level of water resistance of the protective layer.
To obtain a high-quality and reliable concrete pavement, its layer should be about 7-10 cm and be performed only using materials of class B15 or higher.. Prerequisite will be the separation from the wall by means of a compensatory seam, as well as separation by seams in increments of 6 meters.
If you wish, you can easily decorate concrete with stones, using for this purpose, for example, pebbles with a diameter of about 1-2 cm. The amount of material per 1 m² is calculated based on the desired end result. Stones can be stacked without contacting each other, or so tightly that only concrete in the role of binder will remain between them.  Typically, the concrete blind area is used in urban construction, and in the construction of a private house is recommended to use more expensive and reliable materials, which is quite logical, given the disadvantages of concrete pavement. First of all, they include:
- the need to use additional equipment in connection with the constant mixing of concrete (for example, a concrete mixer);
- longer construction time compared with the use of alternative materials for the construction of the blind area (concrete reaches its maximum strength only after four weeks, and it is necessary to moisten it for half of this period every 2-3 hours);
- the possibility of cracks on the surface;
- limited access to the drainage system and the storm sewer system (for diagnostics or repair, you will have to remove the coating and then install a new one).
We advise you to read how to build a formwork for the foundation of the fence, how to stretch the fence from the netting of the chain-link, and how to make a fence out of gabions.
From clay
Clay blind area - the first version of such a protective layer, used by our grandfathers. This is a warm waterproofing coating that can well protect the foundation from precipitation, without requiring much time to construct a protective tape.
The profile of such a blind area must necessarily be reduced to the outside, that is, from the wall. In order to reinforce clay, pre-rammed rubble or gravel is often used, because in combination with the specified material they not only protect the path from the action of water, but also give the whole structure the necessary rigidity.
With proper organization, clay paving can serve for more than a dozen years, of course, if it is not constantly exposed to groundwater, gradually washing out this material.
Among the other drawbacks of the clay walkway is the possibility of heaving due to excessive absorption of moisture (especially important for non-greasy material), and weak foundations may not withstand such pressure, and the house will begin to warp, forming cracks. 
Soft or loose
If the soil around the house removes water well, then such popular materials as gravel and pebbles can be used to equip the blind area.. It is rather simple to lay the bulk “path”, although in the future behind the top layer you will need some care (for example, cleaning the decorative filling).
Features of the device "soft" pavement
The advantages of the soft layer include comparative cheapness, ease of installation, impossibility of cracking and excellent adaptability to seasonal soil displacements, and among the disadvantages point out the need to remove weeds and organize proper care for the upper decorative layer, which, if there is no need for significant maintenance, does not look like already scary.
We recommend to learn how to remove weeds from the garden, which herbicides will help get rid of them, what tool to choose to remove weeds from the roots, as well as what lawn grass will help to destroy weeds.
If desired, the gravel blind area can even be warmed., having laid on the compacted and leveled trench soil extruded polystyrene foam 50 mm thick. A geomembrane with a sufficiently high density is poured over it, and gravel or rubble can already be safely placed on it. True, the use of such coverage for the constant movement of people is highly undesirable. 
Paved
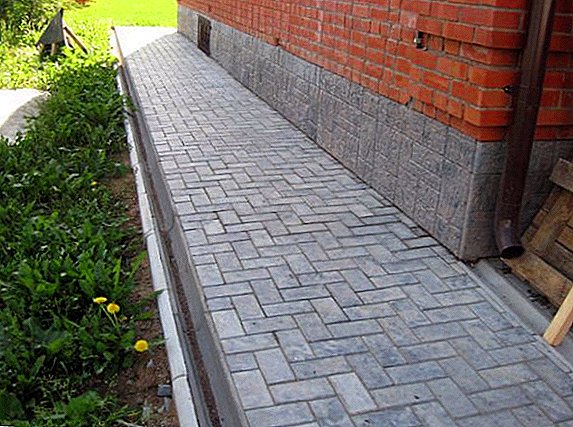
Paving stones and paving slabs were and remain the most popular materials for organizing a paved blind area, although sandstone, granite and quartzite are considered to be equally well-known options. The paved perimeter of the house is durable and has excellent decorative properties., in addition to what is the possibility of its constant use to move around the building.
Important! Paved blind area requires the use of a heaving base, which can ensure the long term of its operation.
The disadvantages of tiling include high material costs (in comparison with the previous versions) and the duration of the laying process. 
Blind area with his own hands
Each type of blind area provides its own characteristics of its arrangement, but in almost all cases you will need tools such as a shovel, trowel, tape measure, pegs with laces, a rubber hammer (subject to the use of tiles), level, capacity for making concrete.
In addition, you will also need to purchase a sufficient amount of the selected material. If it is a paving stone or tile, be sure to ensure that its color fully matches the color of the facade of the building.
Read how you can make a walkway from wood cuts with your own hands, glue different types of wallpaper, insulate window frames for the winter, and build a veranda.
The blind area, made of small tiles, will look more attractive, but its placement will take more time, and in addition to the base material, you will have to purchase more rolled waterproofing (for example, thick construction polyethylene), curbs, sand, and cement. In the presence of drains, it is better to immediately buy collectors and pipes.
Having prepared all the necessary tools and materials, you can proceed to the immediate arrangement of the blind area, the process of which in each individual case will look different.
Out of concrete
Creating a concrete pavement around the perimeter of the house can be called one of the simplest variants of the blind area, and all that is needed is to follow all the steps of this process:
- To begin with, it is necessary to correctly calculate the thickness of the structure, taking into account all layers. In the future, this will help in determining the desired trench depth along the perimeter of the foundation of the house.
- Then the geometric dimensions are calculated.. The average width of the blind area is usually 90-100 cm, so the slope for such a concrete path is calculated at the level of 3-5% (considering that it is common to use a value of 5% for artificial materials, to avoid confusion, it is better to focus on this figure).
- Paper-based markup must be moved to an open area., designating the boundaries of the whole structure with pegs, with a cord stretched between them.
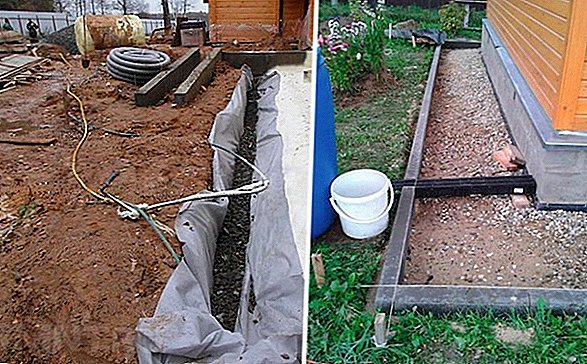
- The next stage - the organization of the trench. A ditch is dug in the indicated place, taking into account all the sizes developed at the beginning (the total depth will depend on the total thickness of all layers).
 Marking trench under the blind area
 - Do not forget about compulsory tamping of the soil at the base and making a clay castlewhich will additionally protect the blind area from excessive moisture.
- The important moment - the organization of a sandy pillow, designed to perform three functions at once: replace the heaving soil, level the base for the future blind area, replace the drainage layer. To achieve maximum efficiency, it is advisable to use only medium or coarse sand, laying it in a 200-millimeter layer on areas with strong soils and 500-mm in areas with an unstable base.
 Sand pillow under the blind area
 - This is followed by the filling of rubble, which performs approximately the same functions as sand.. In addition to rubble, you can also use gravel or sand and gravel. In any case, such a layer will increase the strength of the soil and the reliability of the entire blind area.
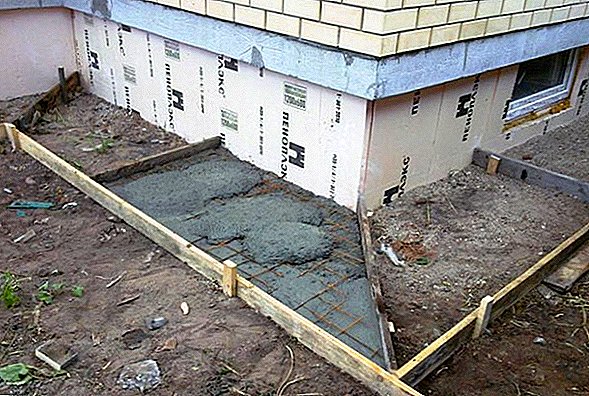
- When all the above layers take their place, you can go to the exhibition of formwork. Boards with a thickness of 22-25 mm are needed to keep the concrete mix within clearly defined limits. To save, you can take previously used boards, as long as they are installed at the very base of the house, providing the necessary expansion joint with its thickness, which is necessary to prevent deformation and cracking of the structure during shrinkage of the blind area and the foundation.
- Behind the formwork you need to put reinforcing meshthat increase the strength of concrete pavement bending. The ideal diameter of such a frame is 10 mm.
 Formwork and reinforcement for blind area
 - Along the perimeter of the basement should be installed transverse boards, providing the organization of deformation seams (as if they cut a continuous web into separate sections, with a step of about two meters).
- And finally, the most important stage in the whole process of organizing a concrete blind area is pouring concrete.. For this purpose, concrete mix M300, which provides the desired level of strength and durability of the whole structure, is perfect. In each compartment between the boards of expansion joints, the filling is carried out in one step, after which the layer should be sealed using vibratory pile drivers or by splicing.

- After pouring the concrete is ironing the surfacewhich should increase its strength.
 Surface iron
Did you know? Since ancient times, mankind has known the healing properties of clay, thanks to which it was used not only in construction, but also in medicine, and even in cooking. So, in Russia, clay diluted with water was used inside to cleanse the body of poisons, and the blue variety was even sold abroad, changing it for gold.
Видео: бетонная отмостка своими руками
From clay
Многие этапы организации глиняной отмостки схожи с предыдущими действиями, но все же в данном случае имеются определенные отличия. Весь процесс проходит в следующем порядке:
- Как и при организации бетонного покрытия, сначала выполняется расчет толщины отмосткиits geometrical dimensions are determined, all data is transferred to the terrain (pegs and a string stretched between them are used for designation), a trench is organized, the soil is tamped down, a layer of sand is poured, and then rubble is poured.
 The organization of the trench under the blind area of clay
 - After that, it is time to lay the clay itself, a layer of 100-150 mm and its compaction (if after the organization of the foundation pit, you have a certain amount of high-quality clay with high strength, then you can use it).
- At the final stage of the construction of the clay blind area, the organization of the decorative layer is carried out., for which decorative stones or pebbles are tamped into the clay. Thus, you get a solid construction and a great walking path around the house.
 The organization of the decorative layer
Important! All layers of clay pavement must be very well compacted, especially in close proximity to the walls of the house. Only in this way can you protect it from erosion by precipitation and groundwater, although, as for the latter, it is better that they do not lie too close to the soil surface.
Soft or loose
Many consider the bulk blind area to be the simplest variant of such a structure, which practically everyone can arrange. In addition, it is fairly accessible and in material terms, so it will be useful to learn about the stages of its organization:
- For a start, dig a trench along the wall of the housewhose depth should reach 0.5 m with a width of 1 m.
 Trenching
 - At the bottom of the trench put a clay layer thickness of 10-15 cm, and the material must be well tamped and leveled, with a slope of 5-6% from the wall (with a meter-wide blind area, its outer edge should be 5-6 cm below the house adjacent to the foundation).
- The selected waterproofing material is laid on the clay layer. (maybe even ordinary PVC film). It can be placed as the width of the clay layer, and to equip an additional tray, thereby providing a longitudinal slope (fine gravel or crushed stone is poured into the resulting slope). Thus, you can achieve not only the diversion of water in the transverse direction, but also in the longitudinal direction, from all sides of the house.
- A layer of drainage is laid on top of the waterproofing layer., which can be represented by coarse gravel sand with a thickness of 10-15 cm.

- The next layer is rubble itself., but in order not to sink into the sand and not to mix with it, before placing it, close the sand layer with geotextile or any other material with similar characteristics and the same functions. Such material will also help to avoid the weed germination, the seeds of which are in any case present in the sand and can slip between rubble.

Paved
The organization of a paved blind area provides for the implementation of almost all the same actions as in the previous case, with the exception of the final stages and characteristics of the material used (usually choose paving slabs or decorative stone).
Important! So that the tile does not move down the slope, which must be present in all blind areas, it is abutted against a curb stone, and under it (for better stability) a concrete lock is arranged on the sand layer.
The process of creating such a blind area occurs in the following sequence:
- For a start, around the house traditionally they dig a moat 30 cm deep and fall asleep with a layer of gravel and clay, all tamping well.
- A waterproofing layer is placed over tamped clay. (PVC film or roofing material).
 Waterproofing layer
 - The next stage - laying out paving stones on cementIt is advisable to pre-sort all the stones by size, so that during the laying process it is possible to combine all the parts together, ideally fitting one stone under the other.

Feedback from network users


What should be taken into account: If there is a drainage system around the house, then the blind area must be made waterproof. Then geotextiles are first laid in a dug trench, crushed stone or pebbles are poured from above. Geotextiles will not allow crushed stone to be pressed into the soil and will protect from subsidence. Minus such a blind area in its heterogeneity, it is harder to tamp it. The blind area should have a slope in the direction from the house, optimally - a slope of 3 - 10 degrees. Between the building and the blind area you need to make a seam and additionally fill it with sand. The smallest pavement width is 60 cm, and for soils, with a tendency to subsidence, it is 1 meter. When calculating the blind area, add 20 cm to the length of the plumb of the roof.

As we see, the independent organization of the blind area around the house is not such a difficult task as it may seem at first glance. However, to obtain an ideal coverage that will successfully perform all the functions assigned to it, it is necessary to follow all the recommendations regarding the construction of each individual type described above.


 Marking trench under the blind area
 Sand pillow under the blind area
 Formwork and reinforcement for blind area
 Surface iron
 The organization of the trench under the blind area of clay
 The organization of the decorative layer
 Trenching

 Waterproofing layer


