The orchid is an exquisite monocotyledonous plant of the Orchid family with beautiful and unique flowers. When growing orchids, it is very important to replant the plant on a regular basis. This measure is necessary to ensure the healthy state of the orchid, since this plant does not like to remain in the same environment for too long. To learn how to properly transplant an orchid, use our tips and tricks.
When you need to replant an orchid: the main causes of transplantation
It should be borne in mind that transplanting to a new container is a definite test for a flower. Therefore, it is important to be very careful throughout the process. The main reasons for planting orchids are in the soil that has outlived its time and in too tight a plant for the plant. As for the period when it is preferable to replant orchids at home, this is the spring season, as the plant begins to grow actively.
There are several external signs indicating the need for orchid transplants:
- If you notice that a lot of free space has formed in the container and the ground has almost completely collapsed and crumpled. In this case, try to wait until the budding period ends and the plant begins to produce new leaves and roots. This is the best period for transplanting an orchid, in which it is well mastered.
- If there is a noticeable smell of dampness, mildew or rotting leaves.
- If after watering the container becomes heavier than usual.
- If the roots of the orchid are darkened and become gray or brown. If you find rotten roots orchid urgently need to replant. Healthy orchid roots should be green.
- If the orchid has a faded appearance.
 Regarding whether it is possible to transplant an orchid in the autumn, we note that September-October transfer is still acceptable. However, in November, with the reduction of daylight hours, the orchid begins to sink into the resting phase. Therefore, if plant transplantation is not required for any urgent reasons, it is better to postpone it until spring.
How to choose a pot and substrate for transplanting orchids at home
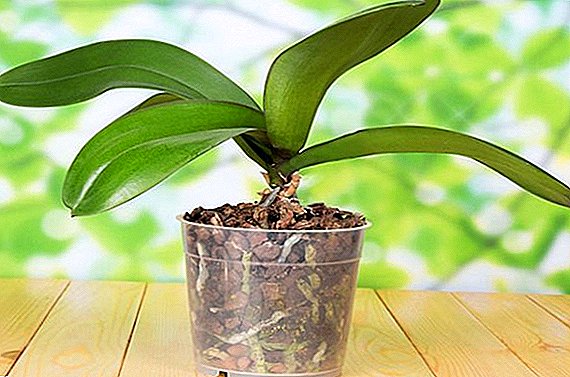
If you have purchased an orchid and are wondering in which pot to plant it, our advice will come to your aid. When choosing a pot for an orchid, you first need to rely on the type of orchid and on the future conditions of the plant. In ceramic vases, the roots will grow to the walls and break during transplantation.
So that the orchid roots are not damaged and you had the opportunity to track their condition, the plant is recommended to be planted in transparent plastic pots. In addition, the plastic container helps to maintain the required level of soil moisture and roots. As for the size of the container, the new pot should be slightly higher and wider.
Did you know? If the neighborhood of a simple plastic container with a flower of exotic beauty is unacceptable for you, place the pot in an elegant glass container or a beautiful basket. This trick will mask plastic and further enhance the splendor of your orchid. The void around the plant can be filled with decorative stones and shells.
Prepare the soil before transplanting the orchid into a new pot. Soil should be special. Ready substrate can be purchased in specialized stores.
There are two types of soil:
- soil for epiphytic orchids (odontoglossum, oncidium, dendrobium, cattley);
- ground for terrestrial orchids (papiopedilum, cypripedium).
 The substrate for epiphytic orchids includes fern roots, oak or birch coal, peat moss (sphagnum) and pine bark.
A mixture for terrestrial orchids contains coal, peat, sphagnum moss, leaf humus and bark.
Ideal substrate for all types of orchids - This is a collection of charcoal, bark, peat, moss, fern roots, foam and pure.
Soil for orchids can be made independently. To do this, take a dry pine bark, boil it well, then leave to dry for several days. Then boil again to sanitize against all viruses and pests. Then cut the dried bark into equal parts measuring about 2 cm and mix with dry crushed peat moss. The shelf life of the substrate for orchids is about two to three years, then the soil needs to be replaced.
How to transplant a homemade orchid: instructions
Consider how to transplant an orchid at home, following the instructions step by step. A transplant is a responsible procedure that involves several steps.
Important! Experienced gardeners recommend that after acquiring an orchid, immediately transplant it into a new pot, more suitable for growing this plant.Before you transplant an orchid, you need to prepare the necessary tools and equipment:
- small shears or garden shears;
- activated carbon or other antibacterial solution;
- drainage;
- ready substrate;
- medium or large plastic pot.
Works on transplanting orchids are carried out in the following sequence:
- First you need to carefully pull the plant out of the old container. The main thing here is not to damage the fragile orchid roots. Lightly squeeze the pot with your hands so that the soil and rhizome move away from the walls. Carefully remove the plant. If the process of removing the orchid from the pot causes any difficulties, cut the container with scissors.
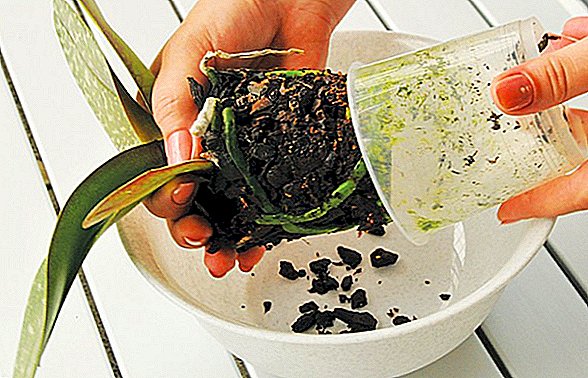
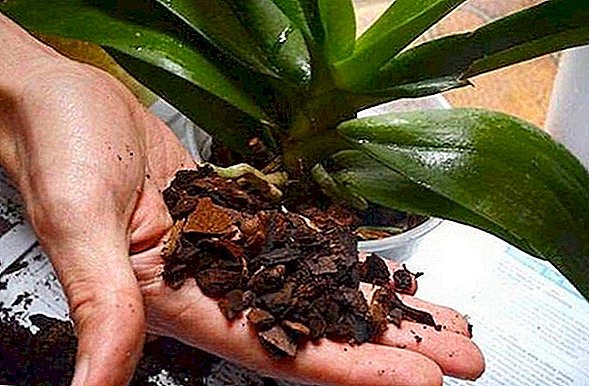
- Before planting an orchid, you need to clean the rhizome of a home plant from an old substrate. This procedure is more convenient to produce under running water. In this case, the earth easily and painlessly moves away from the roots.
- Now proceed to the removal of dried and decayed roots. Carefully cut off excess roots with sharp scissors. Disinfect the cut area with an antibacterial or activated carbon. Try not to touch the healthy roots, it can lead to a long orchid disease.
- After cleaning and pruning the plant, carefully inspect the roots for hidden pests. For further normal growth and development of your flower, you need to get rid of pests effectively. If you find malicious insects on the roots of a plant, soak the rhizome in warm, purified water for several hours. Then it is desirable to treat the plant with a special agent for parasites.
- Thoroughly dry the rhizome. The drying phase should last at least 8 hours.
- Remove yellowed and dried lower leaves. It is also advisable to get rid of soft, empty buds. Slices need to be sanitized.
- We proceed to the process of direct transplanting orchids. Pour a small layer of drainage into a pre-sanitized pot. Dip an orchid in the middle of the tank. Pour the substrate and evenly distribute throughout the root system. If the plant has a lot of aerial roots, do not try to completely cover them with soil.
Also, do not try to press the soil too hard, the rhizome will gradually become fixed in it. But keep in mind that the transplanted plant should not freely hang out in the container. For those who are interested in the question of whether it is possible to replant an orchid with a peduncle, we note that this is undesirable. An actively blooming orchid must carefully cut the peduncle before transplanting. This will help the plant to direct all its resources after transplanting for restoration. In general, if these rules are strictly followed, home care and transplanting of orchids will not cause difficulties.


Important! All tools used in the process of transplanting orchids, do not forget to process bactericidal drugs. You must provide the plant with reliable protection from germs.
Orchid care after transplanting
For orchids, proper care after a successful transplant at home is important. Transfer the plant pot to the shade and protect as much as possible from direct exposure to sunlight (for 8-10 days). The temperature of the room where the plant will be located should not exceed 20 ° C.
 The first watering is made after 4-5 days after transplantation. It is advisable to boil water before watering. Pot with orchid immersed in water for half an hour. The next watering is carried out no earlier than two weeks. The foliage of the plant is also irrigated with warm purified water.
In a month, the orchid is started to be fed with mineral and organic fertilizers enriched in potassium, magnesium and nitrogen. The following feeding is done in 20 days.
After replanting, a homemade orchid may hurt for some time. In addition, the plant is somewhat restrained growth of the rhizome. Therefore, experienced gardeners do not recommend replanting the flower too often (once every 2-3 years is enough).
Did you know? Worldwide known spice vanilla is obtained from orchid fruit. Flat-leaf vanilla. However, not all types of orchids have a pleasant aroma. There are among the orchids and those species that exude the smell of rotten meat. Another interesting and useful fact about an orchid is that what seeing an orchid helps a person cope with depressive states.
If you have figured out how to plant an orchid correctly at home and your exotic plant successfully underwent a transplant, then very soon the beautiful orchid will delight the eye with its magnificence and lush flowering.