Making the incubator with your own hands is easy enough. There are cases when chicks were hatched in basins, buckets, even just under a table lamp. But it is best to make a home incubator according to certain rules.
The proposed manual is simple, based on the study of industrial and home-made incubators, including on the basis of the experimental use of such devices. Practitioners - villagers - say about 90% of the output of goslings, ducklings and chickens.
Incubator DIY
Many poultry farmers breed chicks from geese to quails using an incubator - industrial or hand-made.
The need for a home incubator is dictated primarily by the fact that the hen may not always be available, and the young need to be raised in a clearly planned time frame.
Selection of photos
It is only possible to carry out laying eggs, “incubation”, and the production of offspring in the form of chicks, only if there is a useful device in the household - an incubator.
[nggallery id = 38]
Drawings and description
The frame of this incubator is made of wooden bars and sheathed with outer and inner sides with plywood. Polyfoam is used as thermal insulation.
Under the top of the ceiling of the chamber in the middle passes an axis on which a special tray for eggs is tightly fixed. On the axis with the help of a metal pin, which is brought out through the top panel, the turns with the eggs are turned.
The tray (25 * 40 cm, height 5 cm) is made of durable metal mesh, the cells of which have dimensions of 2 * 5 cm and with a wire thickness of about 2 mm, the tray is covered with a small nylon mesh at the bottom. Lay the eggs vertically, up with a blunt end.
Four lamps mounted on the bottom of the body (25 W each) serve as a heating element. Each pair of lamps is covered with a metal leaf 1 mm thick, which are placed on two red bricks.
To maintain the desired humidity, baths with water dimensions of 10 * 20 * 5 cm, which are made of tin, are installed. U-shaped tapes of copper wire are soldered to them, on which the fabric is hung, which increases the evaporation surface.
8-10 holes with a diameter of 20-30 mm are drilled in the ceiling of the chamber, 10-12 holes in the lower part. This system allows fresh air to come in, moisten from a drying piece of cloth.
About flooring insulation with their own hands detailed in our article.
Do you know that a thyme has contraindications?
On the cost and effectiveness of autonomous gasification, read here.
 About flooring insulation with their own hands detailed in our article.
From the old refrigerator
 Most often, an old waste refrigerator is used for the manufacture of an incubator. This is a ready-made insulated chamber, all that remains is to install small parts - and you can breed young birds.
The figure shows the incubator in general. In order to give rigidity, two boards are attached to the body itself. From the bottom, they are connected with bars and screwed with screws.
In the board make a recess for the flanges. The bearing is pressed into the center, and to prevent the axis from shifting, a sleeve with a thread is inserted, which is attached to the axis with a long screw.
All frames consist of two half-frames with protrusions that are necessary to keep the trays in the positions of the angles of rotation. In the upper holes refuel cable, which is mounted on the engine.
Inside, the body of the refrigerator is sheathed with insulation, as a rule, it is fiberglass, which means that you need to insert a plastic pipe sling into all the ventilation holes.
From foam
Such incubators are made of wooden bars, which are upholstered on the outside with a sheet of tin, and on the inside they are covered with a layer of foam plastic or any insulating and heat-reflecting material, the filling of the incubator is very similar to industrial.
Automatic heating system
It is extremely important to correctly position the heating elements in an incubator without a fan. In different homemade incubators they are located differently: under the eggs, above the eggs, from above, from the side, or even around the perimeter.
The distance from the eggs to the heating element depends on the type of heater. For example, if light bulbs are used, then the distance must be at least 25 cm, and if you choose nichrome wire as a heating element, then 10 cm is enough. No drafts should be allowed, otherwise the whole brood will die.
Thermostat and wiring diagram of the device

For the development of the embryo inside the egg, it is necessary to observe certain necessary temperature conditions, which must be maintained with an absolute error of half a degree.
This error is made up of the temperature difference over the surface of the tray with hatching eggs and the error of the temperature maintained by the device by the thermostat.
It is possible to use bimetallic plates, electrical contactors, barometric sensors as a heat regulator.
Comparative description of homemade thermostats
- Electrical Contactor. This is a mercury thermometer into which the electrode is soldered. The second electrode is a mercury column. During heating, mercury moves along a glass tube and, reaching the electrode, closes the electrical circuit. This is a signal to turn off the heating of the incubator.
- Bimetallic plate. The cheapest, but also the most unreliable means of heating the incubator. The principal action is that when the plate with different temperature expansion is heated, it is bent and, touching the second electrode, closes the circuit.
- Barometric sensor. It is a hermetically sealed cylinder of elastic metal, with a height less than the diameter, filled with ether. One of the electrodes is the cylinder itself, the other is a screw fixed millimeter from the bottom. When heated, the pairs of ether increase the pressure and the bottom is bent, thus closing the circuit, which is a signal to turn off the heating elements.

Every Samodelkin has a choice - which thermostat to adapt to his incubator. But it must be remembered that all these devices are quite flammable. You can, by the way, buy a ready-made thermostat.
Moisture control
Or, alternatively, make independently of two thermometers, which are fixed on the same board. The nose part of one thermometer should be wrapped with 3-4 layers of sterile medical bandage, the other end immersed in a container with distilled water. The second thermometer remains dry. The difference in thermometer readings determine the humidity in the incubator.
Modes
Immediately before starting the incubation, it is necessary to check the reliability of the incubator system for 3 days and try to establish the temperature required for the process.
It is especially important that there is no overheating: if within 10 minutes the germ is at a temperature of 41 degrees, it will die.
In industrially manufactured incubators, eggs are rolled every 2 hours, but 3 coups a day is enough. It is necessary to turn the eggs, as there is a temperature difference between the eggs of about 2 degrees on different sides.
Egg rejection
 For a high percentage of hatchability, pre-collection and proper storage conditions for eggs are of paramount importance.
Store eggs for brood in a horizontal position, turning them periodically, at a temperature not higher than 12 degrees and humidity not more than 80%.
Rejected eggs with damaged, thin or rough surface, irregular shape. With the aid of an ovoskop device, eggs with two yolks, with a large chamber out of the air, are debugged.
Eggs before incubation no way to washbecause it damages the film above the shell, which has certain properties. Too large eggs are also not suitable for incubation.
Differences in temperature conditions for different types of birds
Different birds have different periods and incubation temperatures. Consider some types of birds:
- Chickens: on day 1-2, the temperature is 39 degrees, 3-18 - 38.5 degrees, 19-21 - 37.5 degrees.
- Ducks: at 1-12 days, the temperature is 37.7 degrees, 13-24 - 37.4 degrees, 25-28 - 37.2 degrees.
- Independent: at 1-30 days temperature 37.5 degrees.
- GeeseA: 1-28 days 37.5 degrees.
- Turkeys: at 1-25 days of 37.5 degrees, in the 25-28 days - 37.2 degrees.
- Quail: at 1-17 days of 37.5 degrees.
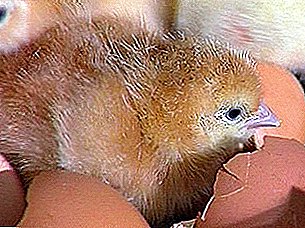
First day of hatched chicks
 On the first day of hatching, chickens are settled in cardboard boxes, on the bottom of which they put a newspaper. Since chicks are accustomed to heat, they need to create the same conditions for a while. If necessary, put a desk lamp in the box.
Cloth fabric is not used because chickens easily get tangled in it. In the first days of life, young animals are fed with a hard-boiled egg at the rate of half an egg per head per day.
In addition to food, chickens constantly need clean, warm water. Starting from the third day, boiled millet, cottage cheese, crackers are introduced.