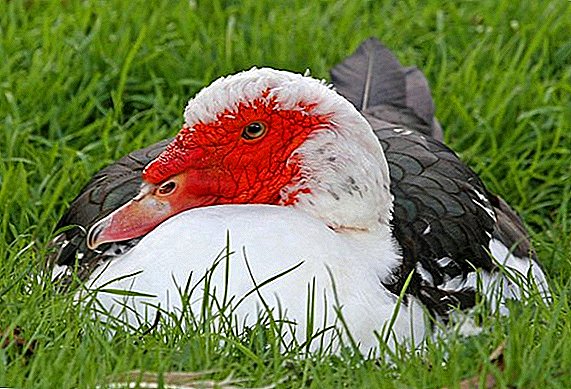
Breeding quail is profitable. They are kept for obtaining delicate dietary meat and eggs, which are useful for people of all ages.
They have an exquisite taste and are often used in the preparation of gourmet dishes. That is why the tendency to breed quails is becoming more and more popular.
Most often, these birds are grown in cages that can be installed even in a city apartment. Let's look at issues related to the conditions of the quails, as well as learn how you can independently build housing for these charming birds.
Basic requirements for cells
The main requirements for quail dwellings are the following:
- no high humidity. The appearance of dampness can adversely affect the health of the bird, and even lead to its death;
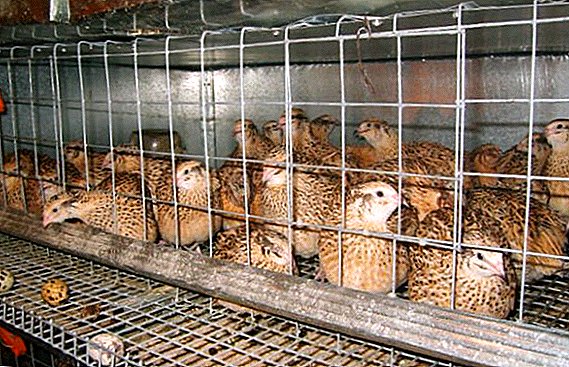
- suitable cell size. Adult birds and chicks can not be kept in the same cage - their size should correspond to the size of quails, because young animals should not fall through the mesh. Therefore, the older generation of birds should be kept separate from the younger;
- the size of the cage must correspond to the number of individuals that will live in it. Considering the previous parameter, for adult quails, the landing density should be about 15 square meters. cm of free space per bird, which is about 15-17 square meters. dm 10 quail (for the parent flock) or 10-12 square meters. DM (for meat and edible eggs);
Did you know? In the Russian Empire, quail eggs were always present on the tables of the emperor and the nobility.
- temperature conditions. Maintaining the optimal thermal conditions can be done using cellular batteries, the air should be heated to +20 ° C;
- correct construction The structure of the building may have a different appearance depending on the purpose of breeding quail.

How to make a cage for quail
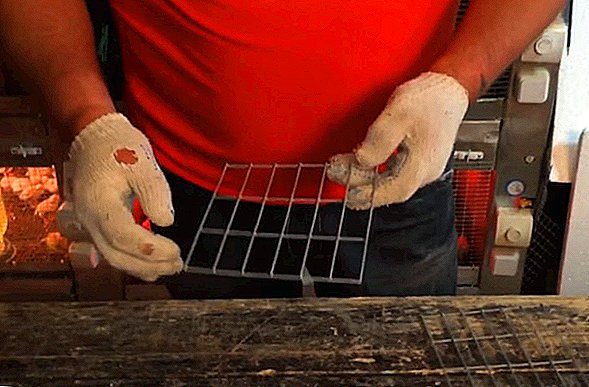
Before you start creating a home for quails, you must select the material from which it will be built. The most popular option is the grid. It can be plastic or galvanized.
We advise you to read about how to make drinkers, feeders, brooder and quail shed with your own hands.
The size of its cells and the material depends on whether the young or adults are caged, and the goals that the breeder sets for themselves.
Depending on these parameters, allocate:
- brooders for newborn chicks in which babies are kept until they reach 10 days of age;
- for young. Here are the quail, which has not yet turned 45 days;
- open-air cages for adults;
- for birds kept in order to obtain a food egg;
- for the maintenance of parental individuals;
- brooders, which contains poultry for fattening, for meat.
 Each cell should be equipped with drinkers and feeders, and, if necessary, with cellular heaters.
From the grid
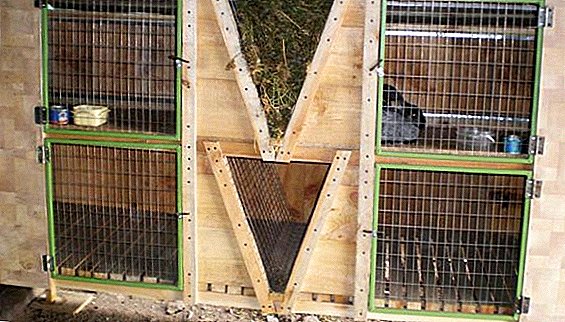
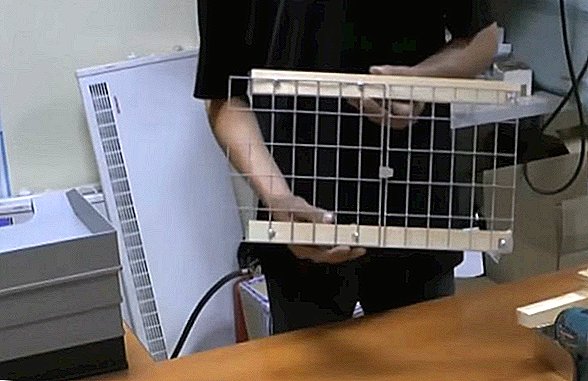
Making a cage for quails from the net is an advantageous and simple variant of keeping birds. The option of creating an inexpensive but professional structure for 30-35 quails (depending on the breed) will be described below.
Materials:
- 90 cm wide hot-dip galvanized mesh with 25 * 25 mm mesh. The diameter of the wire - 2 mm (can be taken galvanized welded mesh with a wire diameter of 1.6-1.8 mm);
- 90 cm wide wire mesh with a 12.5 * 25 mm mesh of 2 mm hot-dip galvanized wire, piece 60 cm long;
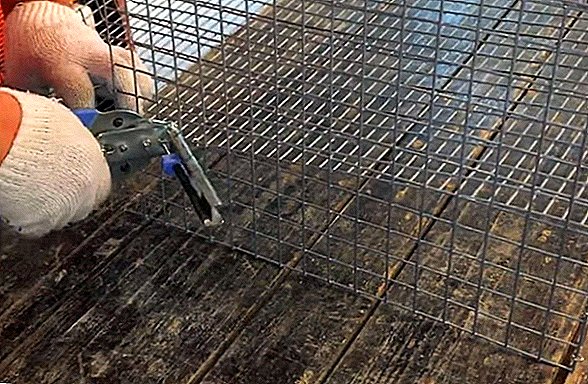
- tools: Bulgarian, kiyanka, clipper with brackets.
We recommend reading about how to properly feed quails and quails, when there is a period of egg production at quails, how many eggs a quail carries per day, what to do if no quails rush, and how to contain laying quails at home.
Instructions for creating cells from the grid:
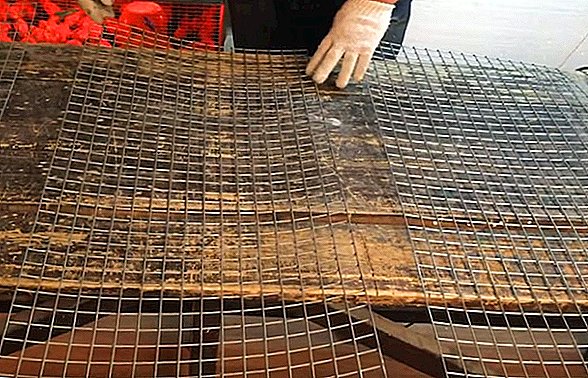
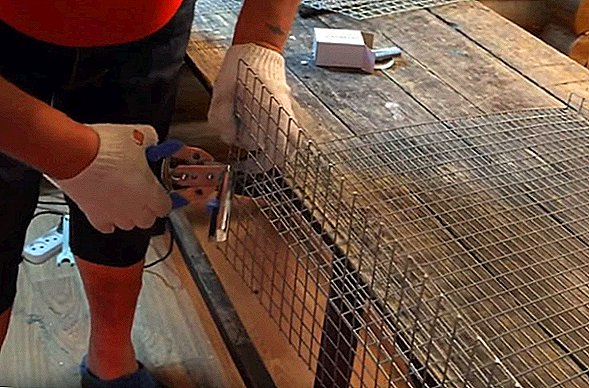
- Flatten the roll grid. To do this, put it on a stable table and extend it diagonally with gloved hands.

- Bulgarian cut off the sharp edges of the grid, so that they are smooth.

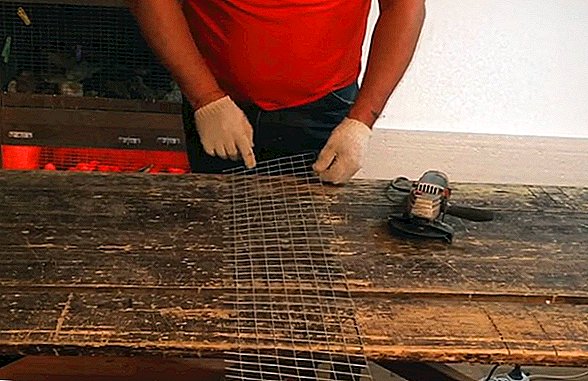
- Count and mark 17 cells, which is 42.5 cm, with a grid length of 90 cm. With a grinder, cut 2 such blanks that will serve as the top and bottom of the cage.
- To fabricate the back of the cage, it is necessary to measure 11 cells. The size of the workpiece should be 90 * 27.5 cm.

- To create the side parts, you also need to count and cut the workpiece into 11 cells. The resulting part of the grid should be divided into two, cutting it across. Thus, 2 blanks of 11 * 17 cells each should turn out.

- For the manufacture of the front part, it is recommended to use a mesh with a cell of 25 * 50 mm in size, however, in the absence of such on sale, a mesh with a mesh and 25 * 25 can be used by cutting through the feeding holes. With a length of 90 cm, the width of the workpiece should be equal to 6 cells.
- In order to cut through the door in the workpiece for the front of the cage, it is necessary to retreat from the edge of the 7 cells. The door has a size of 6 * 4 compartments, leaving 2 at the bottom. Door openings make two.
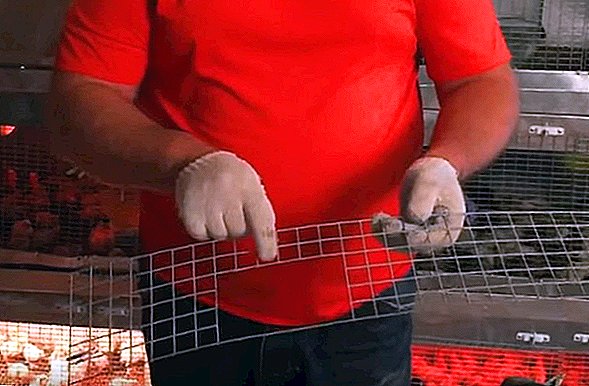
- In order to provide quails with the opportunity to conveniently eat food, it is necessary to get rid of the transverse partition between the vertical rows of cells in the front blank, retreating 2 rows from the bottom and top. Such vertical windows will allow the bird to stick out the head for feeding.

- The doors are cut out from a 25 * 50 mm grid measuring 6 by 3 compartments or from a 25 * 25 grid, cutting out one horizontal bridge between the transverse rows of cells to form windows. The size of the door should be larger than the window for it in front of the blank.
- The grid 60 * 90 to lay on the table in such a way that the longitudinal wires were higher than the cross. Then fix it so that the two rows of cells are outside the table. Then begin to tap the hanging two rows of cells with a mallet in order to bend them 90 °.

- Cage assembly: bottom and back end connection. For this, 6 cells are counted on the rear part blank and in this place are attached to the bottom blank by means of a clipper. Thus, the rear part is fixed in such a way that 6 rows of holes remain at the top and 5 remain at the bottom.
- Attach the top to the edge of the back of the staples. Then do the same with the side blanks, connecting them along the edge with the back wall and top.
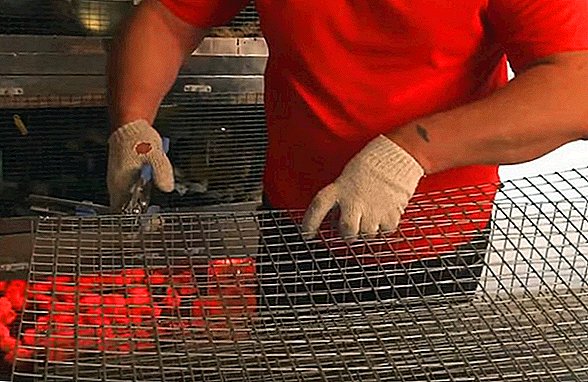
- To fix the bottom of the cell under the slope, we need to do the following: since one side of the bottom is already fixed, it is necessary to attach the other with the help of brackets to the side parts in two places. To determine the place of fixation precisely, it is necessary to count on the side 3 and 4 cells from the front and go down one row below.
- Attach the lower part of the cage, which will serve to accommodate the pallet, and then the front part, attaching first the top and then the sides.
- Cut small side blanks into one row of 25 * 50 cells with a length of 15-16 compartments.
 Secure them with staples on the side of the egg box, resulting from the bend of the edge of the bottom of the cage.
Important! It is better to place cells with quails above each other, but not more than 4 tiers. This will save space in the room and make it easier to take care of the bird.
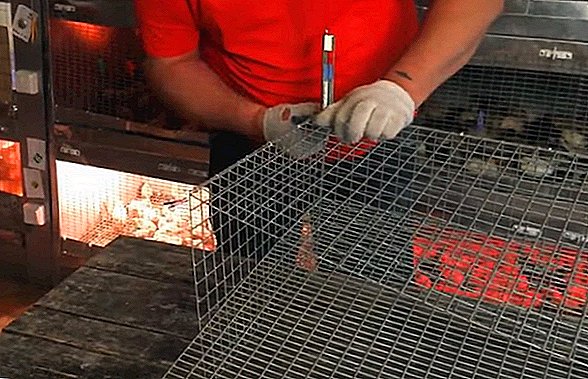
- The doors are fastened with brackets on the upper edge, at the junction of the top and front.


 Secure them with staples on the side of the egg box, resulting from the bend of the edge of the bottom of the cage.
Video: how to make a cage for quail from the grid
From plastic box
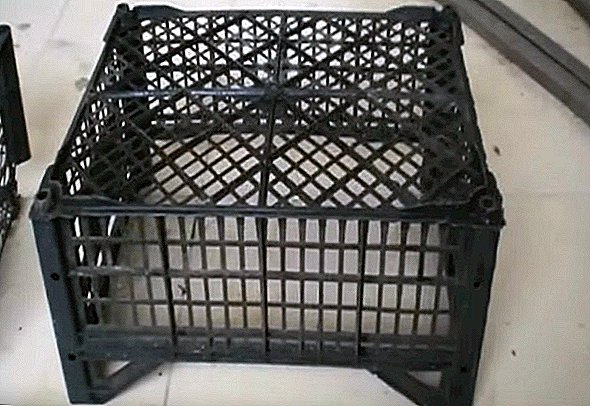
The cage that is described in this manual may become a housing for 5-9 quails.
Materials:
- 3 plastic boxes, one of which should be higher than the others.
- tool: hacksaw, hacksaw blade holder, sharp knife, nylon tie.
A tall box will serve as the base for the cage. The other two may be lower, since we will cut them and use only individual parts.
Read more about how to make a perosnyam machine with your own hands.
Instruction:
- Turn the tall box upside down - it will stand on a kind of legs, to each of which is attached a diagonal crossbar (you must get rid of it).
- The second box. Cut the bottom at a height of approximately two cells. Continuing to work with the bottom, it is necessary to get rid of plastic tubes in the corners of the bottom.

- The third box. Also cut the bottom at about the same level as in the second box, and then remove the one side of the resulting blank. So it turns out the base under the pan, which will fall on bird droppings.
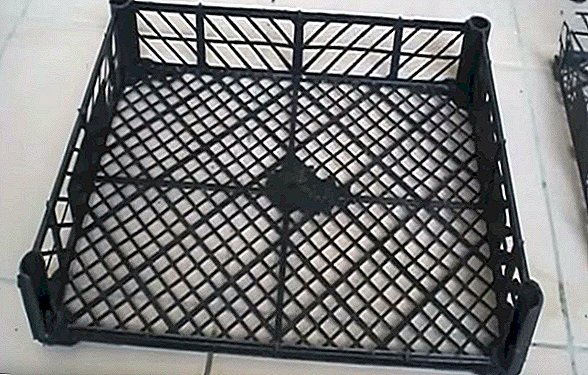
- The workpiece from the second cell, which will serve as the bottom, must be rid of all external projections using a sharp knife.
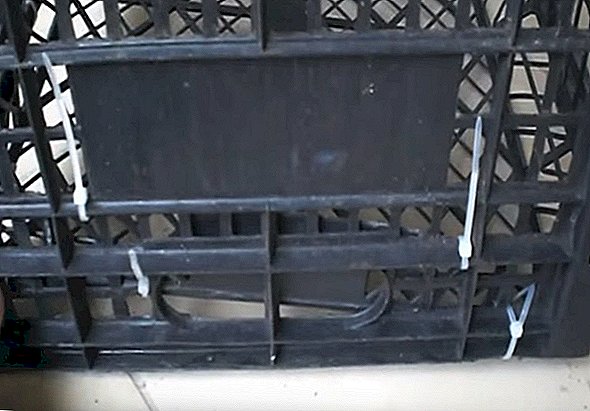
- Assembling the cage: connect the blank from the first box to the blank from the second with plastic clips so that the bottom is fixed at a slight inclination (so that the quail egg can roll out). On the back wall, the bottom is fixed at a small height, and on the front - so that a small gap is obtained.
- Using a gas lighter, heat the plastic on the front of the bottom and bend it at a slight angle to the side.

- Install the resulting structure on the workpiece from the third box so that there is a part with a hole in front, and fasten everything together with plastic ties.

- Cut small windows with a sharp knife in the side and front of the cage, removing the transverse partitions of the box so that the bird can have access to the feeder.

- In the upper plane of the cell in the center cut the door, cutting off three sides of one of the square (rectangular) segments of the box.

- Attach the water bottle and the feeder to the sides of the cage.
Important! It is necessary to keep young and mature birds in separate cages. It is extremely important to keep the house clean and to conduct regular disinfection.
As a pallet can serve as a galvanized sheet of metal or cardboard, which must be replaced daily.


Video: how to make a cage for quail from plastic boxes
From wood
Consider making quail cells from wood and plywood. The size of the living space of this product will be 30 * 100 cm.
Materials:
- wooden bars 40 cm long - 5 pcs., 100 cm - 2 pcs., 4 cm - 1 pcs., 21 cm - 1 pcs., 27 cm - 2 pcs. The height and width of the bar can be taken 40 * 40 mm or based on your own preferences;
- grid with a cell of 2.5 * 1.25 cm: 30 * 100 cm 1 piece, 20 * 50 cm - 2 pieces;
- plywood blanks: 30 cm in length and 21 and 17 cm wide on opposite sides - 2 pcs., 100 * 17 cm - 1 pc., 100 * 30 cm - 1 pc .;
- 5 centimeter nails.
Find out what breeds of quails are among the best, and also get acquainted with the peculiarities of the content of such popular breeds of quails as Texas white, Japanese, Pharaoh, Chinese painted, Manchurian, Estonian.
Instruction:
- Make a cage of the bottom of the cage from wooden bars measuring 40 * 100 cm.
- Attach the mesh to the frame with a construction stapler. To keep the brackets tighter, they can be hammered down.
- Determine the middle of the long side of the frame and nail another transverse wooden bar to which you additionally attach the grid so that it does not bend much. The crossbar should be as narrow as possible, since quail droppings will accumulate on it.
- Cut the side wall out of plywood. Its width will be 30 cm, 10 cm less than the width of the frame, since 10 cm must be left for the egg sampler. The height of the cage will be different: closer to the façade it will be 21 cm, to the back wall - 17 cm. A difference of 4 cm is approximately 7-8 ° and will allow the eggs to slide downwards unhindered.

- Attach a bar to the wall, equal in size to the width of the frame. Fix the side piece so that the bar remains on the outer side of the wall, and connect the two bars with each other with self-tapping screws.

- To the inner side of the wall for fixing the rear part, nail a 17 cm high bar.
- Attach the back wall to the bars of the side parts so that they remain outside and do not contribute to the collection of litter.
id: 87681 In the middle the back wall can also be additionally fixed with a small bar for reliability.
- Attach the roof of the cage, for this attach it to the bars on the outside of the side walls.

- For the manufacture of the feeder will need a pipe with a diameter of 6-8 cm. Cut it in length in half.
- We make the holder for the feeder of two plywood slats, connecting with jumpers on opposite sides. Its height should not exceed 5 cm.
- The holder for the drinker can be made from the net by making a three-sided rectangular structure of it, which is fastened to the feeder holder with staples.
- On the front side of the cage, reinforce the structure with another vertical bar 21 cm high.

- Attach the holder for the feeders and drinkers to the front and the vertical bar in the middle with screws, the holder for the drinker with brackets.
- Attach a slat a few centimeters high to the bottom of the structure, which will prevent the eggs from rolling out of the cage.
- Close the left side of the front side with a piece of netting, leaving enough open space at the bottom so that the birds can feed.
- The right frontal part will be closed on the mesh door. First you need to make the hinges for its attachment. Their role will be played by nails without caps bent in half. Lock the door on the hinges driven into the center bar. The door will be locked on the wrappers, which also serve as nails, but without caps.
- Attach plywood legs (27 cm long and 13 cm wide on one side and 17 cm on the opposite side) to the cell frame on the inside. It is possible to strengthen them with the help of bars from the outside in order to make the construction more reliable, without creating obstacles to the pallet pulling.


Features of the cellular content of poultry
When the content of quails in the cells should follow certain recommendations and rules:
- the height of the room in which the birds will live should not exceed 25 cm. This is caused by the need to prevent the birds from flying upwards and gaining greater speed, which can cause injury to them;
- it is necessary to locate the cage with birds in a place where there are no drafts, sharp fluctuations in temperature, and no dampness. However, good ventilation should be provided for fresh air intake;
- quails should be protected from direct sunlight, which adversely affect the state of their nervous system and can cause stress. The latter can reduce egg production or even cause cannibalism;
- light day birds should last 16-18 hours. If it is shorter, the sexual development of the younger generation may be delayed, the productivity of the hens decreases;
- the temperature in the room where the cells are located should be within 19 ... 20 ° C;
- cells should be created in such a way that they can be easily washed and disinfected;
- Fresh water should be freely available at any time;
- birds love to swim in the sand, for this you can put a container with it in a cage.
Did you know? Quail eggs are used in the perfume industry of many European countries, they are used in the production of creams and shampoos of high price category. And all thanks to tyrosine - an amino acid that cares about skin health and beautiful complexion.Making a cage for quails with your own hands is a simple, however, time consuming process.
 We hope that following our recommendations, you will be able to arrange a comfortable and functional dwelling for quails and benefit from these birds.