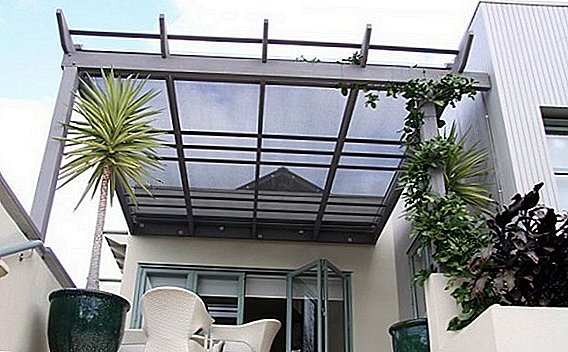
 A visor above the entrance door is used to protect the entrance from precipitation, sun and other natural factors. In addition, the visor has a decorative function and serves to decorate the entrance to the house. Done with his own hands, he is the subject of special pride of the owners. It can be made of metal, tile, plastic, wood, corrugated, polycarbonate or other materials. In this article we will consider a visor made of polycarbonate, its advantages, types and features.
Benefits
The peak from such material has the mass of advantages:
- polycarbonate is easy to install and has a low dead weight;
- it is durable and can be operated in a wide range of temperatures;
- well passes a sunlight - does not shade the territory;
- impact resistant - can withstand mechanical shock, including severe hail;
- it is steady against loadings - maintains the weight of snow mass;
- not flammable;
- easily bends, therefore can take any form;
- Available in various color shades.

Did you know? Polycarbonate is used in the manufacture of lenses for glasses. Such lenses are 10 times stronger than any others, and are also considered the safest.
Types of polycarbonate linens
Consider the main types of polycarbonate webs:
- Cellular Polycarbonate - similar in structure to the honeycomb in the hive, hence the name. Width of a leaf makes 2,05 m. Scope of application: peaks, covering of greenhouses, winter gardens.

- Monolithic polycarbonate - produced in cast sheets. Sheet size is 3,05х2,05 m. Thickness - from 2 to 12 mm. It is used for the manufacture of bank racks, noise barriers, protective screens, bus stops.

- Undulating - similar to monolithic, but has a wave form. The width of the sheet and the scope of application are the same as that of the monolithic.

It will be useful for owners of country houses, summer cottages, as well as residents of the private sector in cities how to install sectional gates, choose and install a brick fence, cover the roof with metal tile, make a blind area of the house, make a metal or wooden fence from the fence, pull the fence out of the chain-link mesh, create a waterfall, build a veranda and make a beautiful garden swing.Polycarbonate sheets can also be transparent and opaque. Opaque sheets are used to create partitions, wall cladding, suspended ceilings, wall decorations. Mosaics from polycarbonate stained glass look very nice. Polycarbonate sheets long retain their color, resistant to scratches and mechanical damage.
Varieties of visors
All peaks consist of a frame, support elements and coating. The frame and supports are made of metal. Coating - polycarbonate sheet.
Important! The canopy width must be at least 0.8 m, length - 0.5 m or slightly more than the width of the entrance door.

The shape of the visors are as follows:
- shed roof - it is mounted from the frame in the form of a right triangle. The short side of the triangle is attached to the wall, and the coating is performed with an inclined sheet along the hypotenuse of the structure. The easiest to install and install;

- shed roof - performed in the form of a house ( - form of construction). Well protects the door from rain. Easy to clean from snow;

- canopy dome - made of wedge-shaped petals, by analogy with an umbrella. The rounded parts make it quite difficult to assemble;

- arched visor - performed in the form of an arch. Great for any room;

- "Marquis" - At the heart of this canopy is the idea of using a summer hanging tent in a cafe. If necessary, the awning is folded or unfolded. Polycarbonate “Marquis” visor cannot be folded, but it retains the basic shape of the awning;

- concave design - such a visor is made of a sheet bent in the opposite direction. Original, but impractical to clean.

Important! If the length of the canopy exceeds 2 m, the structure may fall, therefore additional columns are placed under the central support.
Frame
Most often, the frame is made of aluminum or steel. Aluminum is an easy-to-work plastic material. Non-corrosive. Before installation it is coated with varnish to provide protection from environmental exposure.
The frame of wood is usually used for visors of the same material. This is due to the fact that the tree is not plastic and is exposed to aggressive environment. In addition, the tree is short-lived.
Installing the roof on a new building is an important step that requires proper coordination of actions. Learn how to self-cover the roof with a metal tile, ondulin, to make a mansard and a gable roof.
 Forged metal frame looks best. It can be made in any decorative form and decorated with ornaments. It perfectly decorates both the front door and the wall around it.
Did you know? The first door visors began to be used in Chinese architecture. A progenitor of the visor can be considered a pagoda, in which each tier is decorated with a roof-visor.
How to install the visor
To install the visor, you need the following tools:
- welding machine;
- Bulgarian;
- drill usual + set of drills;
- perforator for installing the finished product;
- the screwdriver with a nozzle for screws;
- paint brush for priming and painting the finished product.
To decorate your home, familiarize yourself with removing old paint from the walls, glueing different types of wallpaper, insulate window frames for the winter, install a light switch, a power outlet and install a flowing water heater.
 Welding machine Installation materials:
- metal pipe for frame parts;
- polycarbonate to cover the visor;
- metal primer;
- paint for metal;
- decorative screws;
- fasteners for the finished product.
 Metal pipe for frame parts
Arbor - a valuable component of the recreation area. Learn how to build a gazebo with your own hands from polycarbonate.
The order of work is as follows:
- Marking work. Determine the shape and size of the future canopy. If you order the manufacture of forged frame or aluminum, then determine the size of the future product will have at the stage of ordering the frame.
- Pipe cutting If you make the frame yourself - cut the metal pipe of the desired size. Remember that when cutting the pipe should be an additional allowance for the length of the pipe for bending. We cut the cut pipe into the forms we need.
- Welding combine parts of the frame.
- Cut the polycarbonate sheet into parts of the required sizes and shapes.
- Fastening on the wall. We ground the metal and paint in the desired color. Further work is carried out after the complete drying of the paint. Fasten the frame anchors. With the help of screws fasten polycarbonate coating to the frame.
If you like to do everything yourself, read how to properly sheathe the door, make a plasterboard partition with a doorway, install blinds on plastic windows and warm the window frames for the winter.To install the visor with your own hands is not so difficult. Be careful when taking measurements, and you facilitate your work by the absence of the need for additional alterations.
Video: how to make a polycarbonate visor
Reviews from the Internet about the visor over the porch made of polycarbonate
Hello forum users! Looking for your advice :), especially those who have already done awnings, canopies, etc.
I'm going to do something like this visor DSC_0286 copy.jpg The three designated pipes will be 25x50x2 (wide side up, so that it is easier to fix the PC), the rest 25x25x2. What do you think, will sustain such a visor on 6 mounts to the wall?
And another question: in what sequence should such a visor be assembled? 1. Boil the whole frame on the ground, and then lift it up and fasten it to the wall (I think it will be quite difficult) 2. Boil the main triangles :)) I don’t know how to call them correctly), attach to the wall, and then to them weld crosspieces


