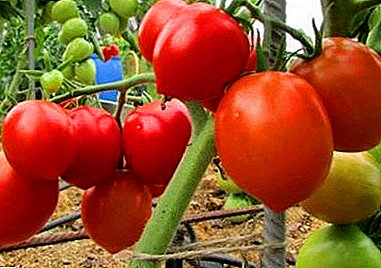
Among the most popular country houses occupy a special place greenhouses. You can use them in different ways. For example, for the cultivation of flower seedlings, herbs, thermophilic vegetables.
But the main task of the design remains unchanged - protect plants from sudden changes in temperature and bad weather, in particular frosts, heavy rains, hail and other things.
Glass greenhouses: advantages and disadvantages of the material
Glass selection like main material for the construction of greenhouses more than justified. First of all, because passes UV light wellaccordingly, the plants freely receive the necessary amount of sunlight.
 There is another, not less important advantage: if necessary, glass is easy to replace. It is also easy to monitor the cleanliness of the construction: it is enough to wipe the surface occasionally with a damp cloth.
And, of course, you need to note long service life glass greenhouses. Their useful life is calculated for years.
It would seem the best choice. But, alas, he is not deprived deficiencies. In particular:
- for arranging greenhouses need a strong foundation, since each sheet of glass has a lot of weight;
- limited to the construction in the form of a house. When using frames and glass other options, alas, are not available;
- despite numerous advantages, glass is still relatively fragile material;
- the fact that the glass is well transmitting the sun's rays is at the same time both an advantage and a disadvantage: in summer, when the ambient temperature reaches over 30 degrees Celsius, it can become in the greenhouse itself too hotthat adversely affects the plants.
The main advantages of glass packs
Popular today double glazing found their wide application not only in apartment and private houses, but also outbuildings. In particular, double glazing for greenhouses presented in this assortment line:
- 1- and 2-chamber;
- energy saving;
- heat saving;
- hardened.
As each of the double-glazed windows performs a number important functions, namely:

- the creation of a noise barrier;
- preservation of heat inside the room;
- protection against high and low temperatures.
This material is a very good choice for construction. The finished design is characterized by the following benefits:
- strength (compared to a simple glass greenhouse): it is not necessary to strengthen the frame or adjust its shape;
- high reliability and the ability to do without a long time repair. Unlike simple glass, you do not need to change the coverage with each season. Neither snow nor large hail will not violate the integrity of the glass;
- soft diffusion of sunlight;
- esthetic, more accurate appearance of a construction;
- the accumulation of heat inside the room, which eliminates the freezing of plants in winter.
Moreover, if you carry inside additional lighting, you can equip a full-fledged winter garden. And this is an opportunity all year round to grow vegetables and other crops you need.
Preparatory work: choose a place, type of construction
Why is it so important to choose the right place for the construction of the greenhouse? First of all, because its ability to transmit light directly to protect plants from external weather factors directly depends on this.
 For example, when choosing a site, it is important to make sure that neither trees nor other objects will cast a shadow on the building.
Stop the choice better on a plot of land with a flat surface and buried ground, perhaps on a small hillock. This is necessary in order to avoid a decrease in air temperature, otherwise the microclimate inside the greenhouse will be disturbed.
In case you plan to use it year round, it is better to build a building where, if necessary, you can remove the top layer from the soil. This ensures additional protection of plants from strong drafts and cold, winter winds.
Regarding the type of construction, you can build either temporaryeither stationary greenhouse The difference lies in the presence of the foundation. For a temporary greenhouse it is not needed. But in this case will have to take care of other aspects. In particular, nail to the vertical supports of the cross, and bury the latter in the ground. This will increase the reliability of the structure.
For a stationary greenhouse, the sequence of actions will be different. First of all, you need to lay a foundation to protect the soil from moisture, and to ensure the strength of the structure. The choice can be stopped on a monolithic reinforced concrete or ribbon concrete foundation, channels, bars.
Another point that is important to take into account: if you intend to use the greenhouse all year round, you need to take care of its quality heatingoptional illuminated and watering plants.
Choosing a project, adjusting the drawings
 To simplify the construction of the greenhouse, you can use a ready-made drawing. If necessary, make adjustments by adapting the project for the selected land plot.
So, we are determined with architectural form of construction. This process does not take much time, since the glass does not bend, respectively, there are few alternative options.
For example, a rational decision would be rectangular or multifaceted design. The roof can be made 1 - or 2-pitched.
Drawing a future greenhouse is one of the most important stagesbecause it allows you to calculate the required amount of consumables, the amount of costs.
What data to be reflected in the drawing? Let's give an example on a gable greenhouse. If you buy a 10 × 10 cm timber and glass sheets of standard dimensions 160 × 220 cm, 4 mm thick, the distance between the vertical posts will be the most optimal and will be 0.8 m, i.e. exactly half the width of the sheet.
In the event that it is planned to use the greenhouse all year round, the base must be raised above the ground.
Laying the foundation
 Having determined in the previous stages the most suitable place for the construction of the greenhouse, its dimensions, now you need to mark the site. For this purpose, use the simplest wooden pegs and rope.
Note! By correctly filling the foundation, in winter you can save up to 10% heat!
- First of all, we dig a trench 40 cm deep and 30 cm wide.
- We fall asleep with sand, tightly we tamp.
- To strengthen the foundation lay out the armature.
- Fill with concrete.
- Align the top of the formwork using a level. Fill the concrete to the very edge, waiting for it to solidify.
- At the next stage we apply bitumen mastic or roofing felt. This will create a reliable layer of waterproofing.
- Focusing on the height of ½ brick, we make the brickwork at the base of the strapping.
It is important to note! Using polystyrene foam plates need necessarily to warm the foundation from all sides.
Walling and roofing
Especially for the greenhouse strong framethat will sustain the weight of the glass. You can use your choice or tree, or glass. The first option is more environmentally friendly, the second - reliable.
If you intend to use a wooden frame, pay attention to the bars with a section of 10 cm. It is even better if they are additionally impregnated with an autoclave: this will prolong the life of the structure.
If it turned out that the bars you bought in advance, but it turned out that they were not prepared properly, process them antiseptic. In the next stage - cover with stain and paint coat.
Stages of manufacturing a glass greenhouse with a wooden frame
 So, you need to prepare all the elements for future design, namely: upper and lower trim, support bars, corner posts.
- We install bars (10 by 10 cm) on the brick foundation tape, pre-warmed with polystyrene foam plates, securely fastened.
- In 4 corners we beat vertical bars to horizontal bars.
- The last connect with the upper horizontal bars.
- We nail support bars to the lower and upper straps.
To create roof truss system, you need to perform the following steps:
- Select a timber 10 × 5 cm for installation of screeds, central risers, intermediate posts.
- Bars with dimensions of 10 × 3 cm should be used to create a door frame and roof lathing.
- Separately perform the assembly of farms. Can be on the ground or any other flat surface.
- At the next stage we raise them to the frame.
Using a ridge beam, we collect farms. The final stage will be installation of glass: we fasten the sheets using silicone sealant as well as nails. With a wooden or rubber bead we gently wrap the sheets outside. On the roof of the glass is laid on a layer of putty. It is necessary to move in the direction from the bottom up.
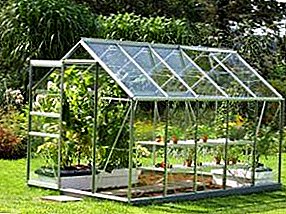
A photo
You can see the possible options for glass greenhouses in the photo below:


Conclusion
As you can see, for the construction of glass greenhouses do not need much time and effort. The finished design is different relative low cost and long service life, looks attractive and provides optimal temperature conditions for growing various garden crops and plants all year round.